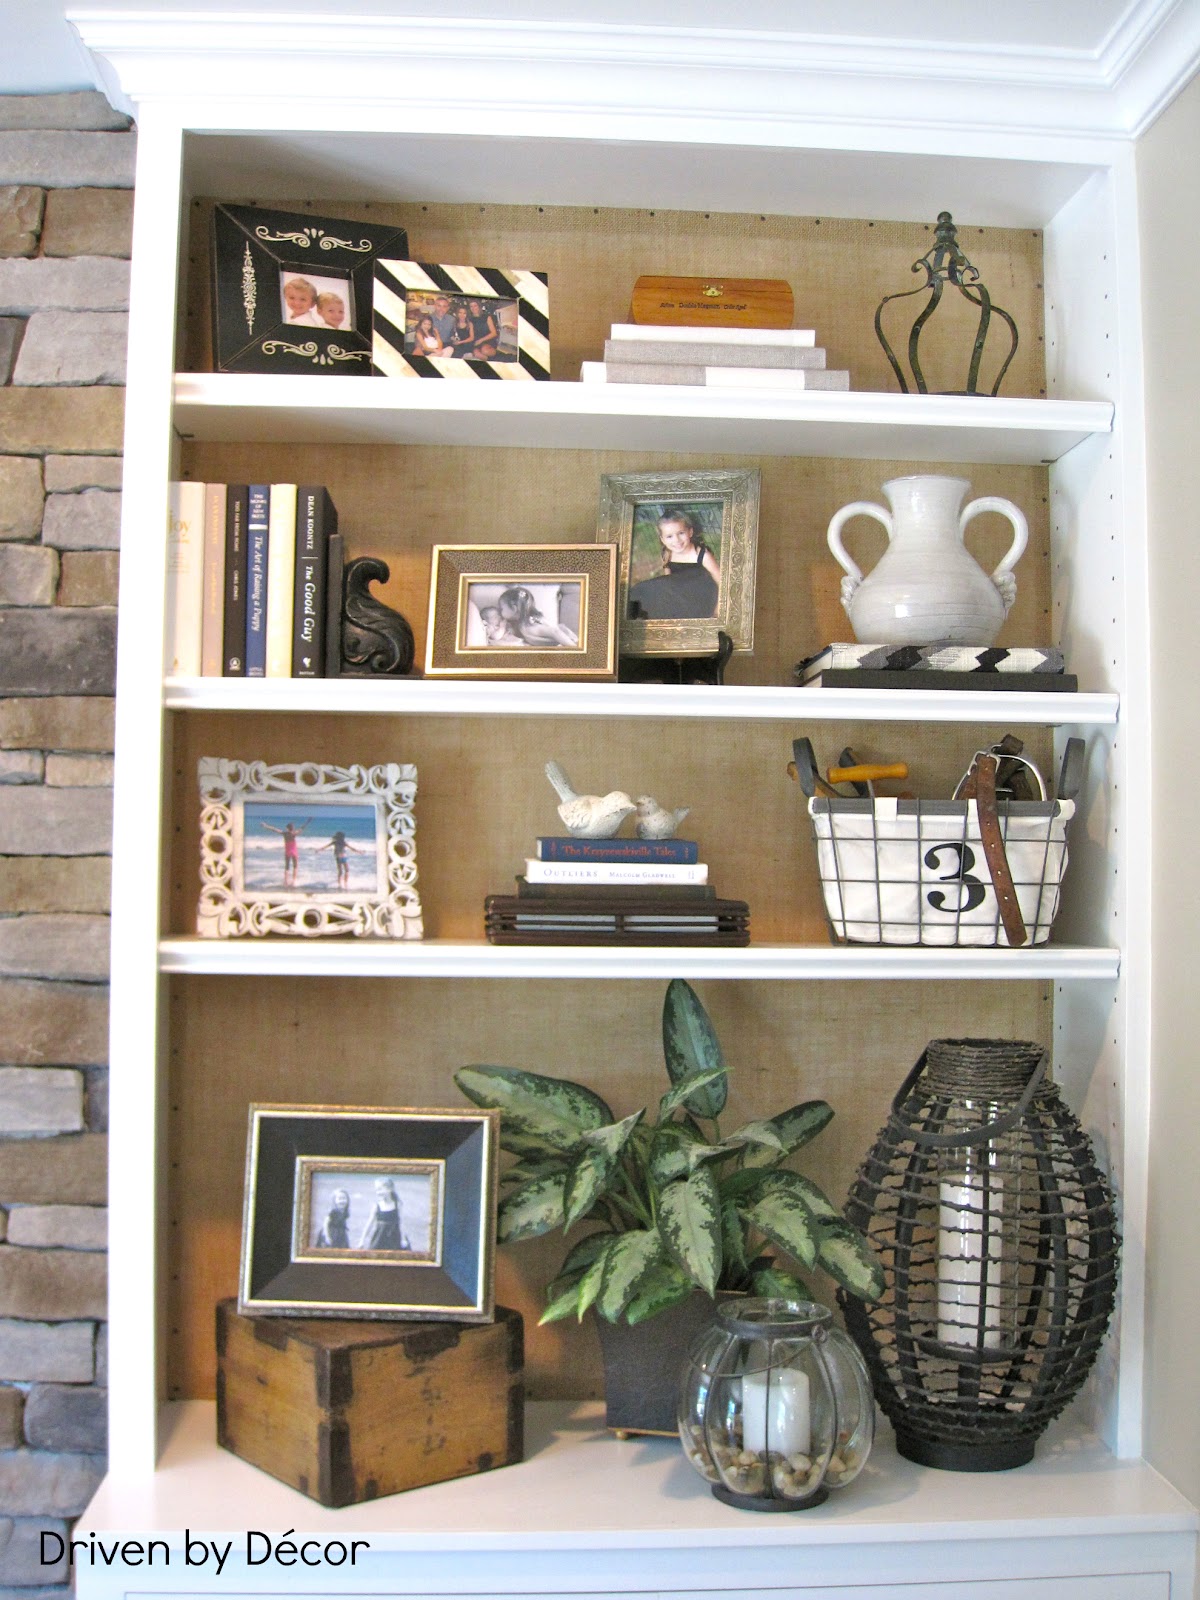
In case you missed it, in Monday's post I blogged about painting the bookcases and adding new moulding and hardware. Today I'm going to give you the low-down on designing the stone veneer fireplace. I thought it would be as simple as walking into the showroom of the fireplace/stone veneer dealer, picking my stone, and scheduling the installation - silly girl, when has any project ever been that easy?! Without boring you with the play-by-play, this seemingly easy task quickly became very frustrating, time-consuming, and stressful. It all could have been prevented if going into the project I had information about the choices I would need to make and a little guidance on how to make them. My goal with this post is to make the process much, much easier for any of you embarking on a similar project. So, without further ado:

1. Do you want to use natural or manufactured (also known as "cultured") stone veneer? The pros of manufactured stone are that it is much less expensive than natural stone and (because it is lighter than natural stone) it is also simpler and less expensive to install. The pro of natural stone is its beauty - there is variation in each and every stone and the end product is gorgeous. If you have a large budget, natural stone is a great choice and may be the way for you to go but I chose manufactured stone veneer to stay within my budget. Considering the amount of money I saved and how close my manufactured stone veneer looks to the "real thing", I'm still very happy with my decision.
2. What style and color of stone should you choose? There are many different styles of stone to choose from including fieldstone,
 |
| via |
stacked stone,
 |
| via |
and river rock
 |
| via |
among many others. You can also use a combination of two different types of stone such as fieldstone and ledgestone. Each style of manufactured stone comes in several color options, making the range of choices mindboggling. I ended up choosing a ledgestone (StoneCraft Industries' Ledgestone) in warm shades of gray and tan ("Pennsylvania" color):

The best way to choose the style and color of stone is to visit a few showrooms that have fireplaces on display with various stone options. Once you've narrowed down your selections by taking into consideration the colors and style of your home, ask to borrow some sample boards so that you can see how the stone looks in your home. If the showroom doesn't have sample boards that they loan out, ask if you can borrow several pieces of stone (get a good variety in size and color) for each of your possible options.
3. Do you want to incorporate any keystones or other stone trim into your fireplace design? The best way to make this decision is to seek inspiration online (think Pinterest!) and in fireplace showrooms. While I chose a basic layout without keystones or other stone trim, you could chose to do a keystone arch surrounding the fireplace opening:
 |
| via |
a row of single-height trim stones above the fireplace opening,

one long, single stone above the fireplace opening,
 |
| via |
or any other design/pattern of trim stone that you can dream up! My advice - keep it simple with either no keystones/trim or a simple design like one of the pics above.
4. Do you want to have a mantel and, if so, what type? If you'd like to have a mantel, it is ideally installed in conjunction with the stone veneer so this decision should be made along with the selection of your stone. There are several different materials that can be used to create a mantel, such as stone,
 |
| via |
 |
| via |
and natural or stained wood:
 |
| via |
 |
| Emily Followill via Things That Inspire |
My fireplace obviously has no mantel - not because I made a conscious decision not to have one but because I hadn't thought to make plans for one before the time of the stone installation. I like the clean look of not having a mantel, but I definitely have some jealousy over the pretty mantel displays that you gals have for the holidays!
5. How would you like your hearth to be designed? Most of the stone veneer manufacturers carry hearthstones designed to coordinate with your chosen stone veneer. However, beware - the hearthstones that were meant to go with the stone veneer that I chose were ugly and fake looking. The lesson here is to make sure you ask to see the coordinating hearthstones and not just assume that they will look just as good as the stone veneer you chose! If you don't like what you see, shop around - I was able to find hearthstones that I liked from a different manufacturer:

Also consider how you want your hearthstones laid - you can lay them the typical way like I did or choose to have them broken up with mortar in between the pieces:

Another option to consider is using natural stone for the hearth even if you used manufactured stone veneer for the rest of the fireplace. When natural stone is used, it's typically in a large slab such as this bluestone slab hearth:
 |
| via |
The natural stone costs more than manufactured hearthstones but for most fireplaces it's not too large of an area so the difference in cost may be doable.
Thanks for hanging in there through my list of five important decisions in designing a stone veneer fireplace! I know it's not the most exciting of topics, but for those of you embarking on a fireplace remodel project, I hope the info will be helpful. Check back in later this week for the final post on transforming my fireplace and built-in bookcases including a DIY tutorial on lining the back of bookcases with burlap!